Introduction:
What is PC PartPicker?
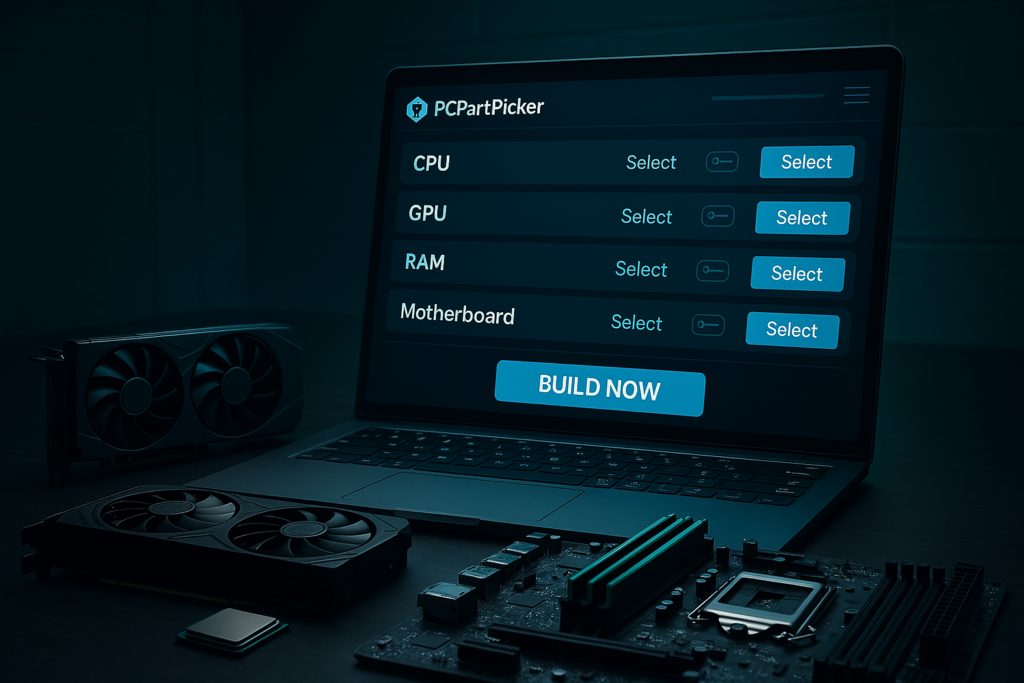
PC PartPicker: The Ultimate Tool For Your Custom PC Build is a free online tool that makes it easy for anyone to plan and build their own custom PC. It helps users choose the right parts like CPU, motherboard, RAM, and more, while making sure all the components are compatible. It also shows prices from different websites, so you can build your PC within your budget.
PC PartPicker is a go-to tool for both beginners and experienced PC builders because it makes the whole process simple and stress-free. For beginners, it checks if all the parts work together (compatibility check), shows the latest prices, and gives helpful suggestions. You don’t need deep technical knowledge to start building.
For experienced users, it offers advanced filters, detailed specs, and price tracking, helping them fine-tune their builds and get the best deals.
Overall, it saves time, avoids mistakes, and makes PC building smooth for everyone.
Why It’s Essential for Building a Custom PC?
PC PartPicker saves a lot of time and effort by helping users pick parts that work well together. You don’t have to check each part one by one — it automatically shows only the compatible options.
It also compares prices from different websites, so you can quickly find the best deals without searching everywhere. This makes building a custom PC faster, easier, and more affordable.
Key Features of PC PartPicker:
- Part Compatibility Check
- PC PartPicker makes sure all the parts you select — like CPU, GPU, RAM, and motherboard — are compatible with each other. Here’s how it works in simple words:
- When you pick a part, PC PartPicker filters out the parts that won’t work with it.
- For example, if you choose an Intel CPU, it will only show motherboards that support that CPU.
- It also checks things like RAM type, power supply needs, and case size, so everything fits and works well together.
- If there’s any issue or mismatch, it gives you a warning message before you continue.
- This smart system helps avoid mistakes and makes sure your custom PC works perfectly when you build it.
- Price Comparison
- PC PartPicker helps you save money by showing prices from different online stores for each part.
- When you select a component like a CPU or graphics card, it lists the same product from websites like Amazon, Newegg, and others with their current prices.
- This makes it easy to compare prices in one place, so you don’t have to check every store yourself. You can choose the cheapest option and get the best deals for your PC build.
- Build Guides and Community Builds:
- PC PartPicker provides helpful build guides tailored for specific tasks such as gaming, streaming, video editing, and more. These guides are great for users who want a PC for a particular purpose but are unsure which parts to choose. Each guide includes a full list of compatible components with performance and budget in mind.
- The platform also features a section for community builds where users share their own PC setups. You can browse popular builds based on ratings, use-case, or price range, helping you get ideas and compare different configurations before starting your own build.
How to Use PC PartPicker for Your Custom PC Build:
PC PartPicker: The Ultimate Tool For Your Custom PC Build
Go and check out – List of tech gadgets for tech students and software engineers
Step 1: Go to the PC PartPicker Website
Visit the official website: https://pcpartpicker.com.
You’ll see options like System Builder, Build Guides, Completed Builds, and more.
Step 2: Click on “System Builder”
The System Builder tool is where you start creating your custom PC. It helps you choose every component and checks compatibility as you go.
Step 3: Start Selecting Components
You’ll see a list of parts to pick from:
CPU (Processor) – The brain of your computer. Choose Intel or AMD based on your preference and budget.
- Motherboard – Must match your CPU (socket type). PC PartPicker only shows compatible options after you pick a CPU.
- Memory (RAM) – Choose the right size (8GB, 16GB, etc.) and speed.
- Storage (SSD/HDD) – Add one or more drives for Windows, games, and files.
- Video Card (GPU) – Essential for gaming and video editing.
- Power Supply (PSU) – PC PartPicker suggests wattage based on your parts.
- Case (Cabinet) – Choose a size and design that fits your components.
- Cooler (optional) – Needed for high-performance CPUs or overclocking.
- Operating System – Windows, Linux, etc.

As you select each part, the site will automatically check for compatibility, so you don’t make any mistakes.
PC PartPicker: The Ultimate Tool For Your Custom PC Build
Step 4: Review Estimated Power Usage
PC PartPicker shows the estimated wattage your PC will use. This helps you choose a power supply that gives enough power without wasting money.
Step 5: Compare Prices from Different Retailers
Each part shows price listings from popular online stores like Amazon, Newegg, B&H, etc.
You can compare and choose the best deal without visiting each store manually.
Step 6: Save or Share Your Build
Once your build is complete, you can:
- Save it to your profile (if you have an account)
- Share a link with friends or online forums for feedback
- Print or download the parts list for easy shopping
Step 7: Follow the Build Guides or Watch Tutorials
PC PartPicker also offers written guides and links to YouTube tutorials to help you assemble the PC physically after buying the parts.
Check out: PC Build Guides
PC PartPicker: The Ultimate Tool For Your Custom PC Build
How to Filter and Sort Options:
Tips on Filtering Parts Based on Your Budget, Needs, and Brand Preferences.
PC PartPicker: The Ultimate Tool For Your Custom PC Build
1. Set Your Budget First
Decide how much you\’re willing to spend overall. PC PartPicker shows the total price of your build as you add parts, so you can easily stay within budget. Use the price filters on each part category to avoid overspending.
2. Define Your Purpose
Are you building a PC for gaming, streaming, video editing, or just basic use?
- For gaming, focus more on GPU and CPU.
- For editing/streaming, prioritize CPU, RAM, and storage speed.
- For casual use, go for value-for-money components.
3. Use Filters for Brand Preference
If you like certain brands like AMD, Intel, NVIDIA, ASUS, Corsair, etc., you can use the brand filters in each part section. This helps you find parts you trust or are more familiar with.
4. Sort by Ratings or Popularity
PC PartPicker lets you sort parts by user ratings, reviews, or popularity. This helps you choose parts that are tried and tested by others.
5. Look for Deals and Discounts
Turn on the option to show mail-in rebates or discounts, and keep an eye on the price history chart to buy when prices drop.
6. Check Compatibility Notices
When you filter and select parts, always check the compatibility notes shown below your build. It will highlight any issues or things to consider.
7. Think Long-Term
Try to pick parts that are upgrade-friendly — like a motherboard with extra RAM slots or a power supply with extra wattage — so you can upgrade in the future without changing everything.
PC PartPicker: The Ultimate Tool For Your Custom PC Build
Advantages of Using PC PartPicker
- Time Saving:
- PC PartPicker saves hours of manual work by automatically checking part compatibility, showing available components, and comparing prices in one place. You don’t need to visit multiple websites or research if the parts work together — the tool does it all for you instantly.
- Cost Efficiency
- It helps you stay within budget by listing real-time prices from different retailers like Amazon, Newegg, and more. You can easily spot the best deals, discounts, and even track price drops, making sure you get the most value for your money.
- Access to User Reviews
- It helps you stay within budget by listing real-time prices from different retailers like Amazon, Newegg, and more. You can easily spot the best deals, discounts, and even track price drops, making sure you get the most value for your money.
Common Mistakes to Avoid When Using PC PartPicker
- Ignoring Compatibility Warnings
- Always read the alerts PC PartPicker shows. They help you avoid parts that don’t work together.
- Choosing Parts Without a Purpose
- Select components based on what you need (gaming, editing, basic use), not just how they look or how expensive they are.
- Not Setting a Budget
- Without a spending limit, your build can become unbalanced or too costly. Use price filters to stay on track.
- Overlooking Power Supply Requirements
- Always check total power usage and choose a PSU with extra wattage for safety and upgrades.
- Forgetting About the Case Size (Form Factor)
- Make sure the motherboard, GPU, and other parts fit inside your selected case.
- Not Checking Shipping & Availability
- Some parts may be out of stock or have long delivery times. Always confirm before buying.
- Ignoring User Builds and Reviews
- User reviews and community builds offer valuable insights, tips, and real-world performance feedback. Use them to improve your choices.
Alternatives to PC PartPicker:
- Other tools for building a Custom PC
- While PC PartPicker is one of the most popular tools, there are other platforms like BuildMyPC and PCBuilder that also help users plan custom PC builds.
- BuildMyPC – Simple and beginner-friendly with a clean interface. It shows part prices and compatibility but has fewer retailer options and community features compared to PC PartPicker.
🔗 https://buildmypc.net - PCBuilder – Offers easy part selection and compatibility checks, mainly useful for quick builds. It’s good for basic users but lacks detailed guides, reviews, and advanced filters.
🔗 https://pcbuilder.net - Overall, PC PartPicker stands out with its powerful compatibility engine, price comparison across multiple retailers, and active user community, making it the top choice for both beginners and pros.
Conclution:
Building a custom PC doesn’t have to be confusing or time-consuming — and that’s where PC PartPicker truly shines. With its powerful compatibility checks, real-time price comparisons, helpful community builds, and easy-to-use tools, it’s the perfect platform for both beginners and experienced PC builders.
PC PartPicker: The Ultimate Tool For Your Custom PC Build
Whether you\’re aiming to create a gaming beast, a streaming setup, or a budget-friendly workstation, PC PartPicker helps you plan smart, save money, and build confidently. So before you start your next PC project, be sure to explore everything this tool has to offer!
PC PartPicker: The Ultimate Tool For Your Custom PC Build
Frequently Asked Questions
What is PC PartPicker and why should I use it?
you time and money.
How does PC PartPicker check if my PC parts are compatible?
Can I build a PC using PC PartPicker if I’m a beginner?
Does PC PartPicker show the best prices for PC parts?
Can I view other people\’s PC builds on PC PartPicker?
How do I know which parts are right for my needs (e.g., gaming, streaming, editing)?
budget.
What happens if I make a mistake when choosing my parts on PC PartPicker?
builds.
Is PC PartPicker free to use?
How accurate is the price comparison feature on PC PartPicker?
Can I build a custom gaming PC on PC PartPicker?
out of your build.
You Can Check Out More blogs On Alpha Tech
PC PartPicker: The Ultimate Tool For Your Custom PC Build, PC PartPicker: The Ultimate Tool For Your Custom PC Build,PC PartPicker: The Ultimate Tool For Your Custom PC Build, PC PartPicker: The Ultimate Tool For Your Custom PC Build,PC PartPicker: The Ultimate Tool For Your Custom PC Build, PC PartPicker: The Ultimate Tool For Your Custom PC Build, PC PartPicker: The Ultimate Tool For Your Custom PC Build, PC PartPicker: The Ultimate Tool For Your Custom PC Build, PC PartPicker: The Ultimate Tool For Your Custom PC Build, PC PartPicker: The Ultimate Tool For Your Custom PC Build